 |
Tape Repair |
Okay, we are in luck and have some tapes, what next?
Before doing anything go to this page and read it www.hp9845.net/9845/tutorials/savetapes/. This page covers the general issues you will face when you try to copy data from these tapes. I have four other techniques which you can try but before you use the first three on Control Tapes you should have first practised on tapes that don't matter. Where you have only a single tape and you don't know if you can get another copy then first of all DON'T put it into a drive. In fact I treat every tape as though it is the only remaining copy.
Restoration Tip #1 - Stop the drive band from stripping oxide.
My first step with all tapes is to place the tape upside down on the bench and remove the screws which hold the top cover of the cartridge. Then holding the sides of the top cover pick up the cartridge and turn it over. Now the top cover may be carefully lifted away giving you access to the inside of the cartridge. The drive/tensioning band in the cartridge does deteriorate with time and I've seen about 40% of the HP tapes with broken bands and about 10% of the 3M cartridges have broken bands. Your experience with broken bands may differ. If the band isn't broken then remove it very carefully, try not to stretch it, you may have to partially lift the front and rear rollers. With the band off slowly separate the tape from the band so as to not strip any oxide off of the tape then refit the band using the method outlined on other pages, or follow my procedure.
| #1 | Wind tape back onto the reels. |
| #2 | Lay the band on you bench and see how will naturally form some loops. |
| #3 | You should see a central loop, place the front drive roller into that loop. |
| #4 | Now lift the band and the front roller keeping the roller within the loop. |
| #5 | Place the front roller on it's shaft. |
| #6 | Drop the band near the front roller between the two reels. |
| #7 | Place a rear roller on the shaft nearest the reel with the most tape. |
| #8 | Place band around the tape on the large reel then loop it around the rear roller. |
| #9 | At the same time tension up the tape place the other rear roller on the remaing loop of the band. |
| #10 | While you maintain some tape tension with one hand then with the other hand carefully lift the rear roller and start moving it toward the empty shaft. You may need to slightly angle the roller as it gets closer to the shaft so it is easier to place it on the shaft. |
| #11 | With the last rear roller in place on the shaft you should now retension the tape. |
| #12 | Replace the top cover on the cartridge. |
Restoration Tip #2 -- Only required if the tape gives false EOTs.
The second technique is to stop false End Of Tape (EOT) signals, the technique I use is a departure from that suggested elsewhere. Access to the drives, particulally the front drive, is limited and as the read/write speed is double that of the HP85A/B the technique of using a piece of card to block the End Of Tape (EOT) sensor isn't practical. Further, except for physically removing the tape there can be no operator intervention when the tape is being read so my solution was to cut thin strips of self-adhesive label which are then stuck to the back of the tape (non-oxide side) covering the area where oxide is missing. Here is an example of such a tape.
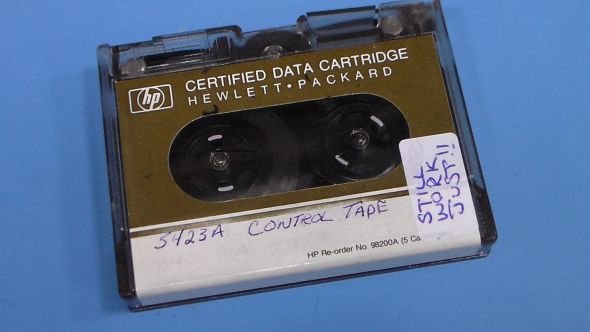
This tape went from be unreadable because of the false EOTs to being able to boot the system. Please note, over time the adhesive may bleed and cause one or more layers of tape to stick. This technique is to be only a short term fix while preparing the tape so a copy can be made. If the self-adhesive labels are left on the tape for any extended period of time then the tape cartridge should be opened up and the tape should be carefully hand wound to check for any sticky patches as running the tape in the drive before hand winding will likely cause more oxide to be stripped off.
Restoration Tip #3 - Required if you have a broken band
For replacement bands I use the bands from tapes that can be sacrificed.
Tip #4 Is a peservation technique.
When storing tapes for any period of time I wind the tape past the front EOT hole by about 6" so that if the band does strip any oxide from the tape it doesn't matter. The only thing to remember is that the tape will need to be wound so that the EOT hole is just past the sensor position before you use the tape, best to put a sticker on the tape to remind you where the EOT hole is located.